Showing posts with label texture. Show all posts

Thursday, August 15, 2013

August Kansas City PMC guild - Cuttlebone Textures

The August meeting is Tuesday, August 20 at Harder Driving School - 7 p.m.

We will be playing with cuttlebones! (Birdlovers will have seen these in your parakeet cages...)
They have jewelry applications as well as being great sources of minerals for pets.

They also have great, organic textures and are soft enough to carve and use for metal casting.

 (Plaster of paris is probably easier to work with, however.)
There is a very good tutorial for carving cuttlebone for casting here, at Art Jewelry Magazine.

And, they can be used to polish things....as in a natural sandpaper of sorts.


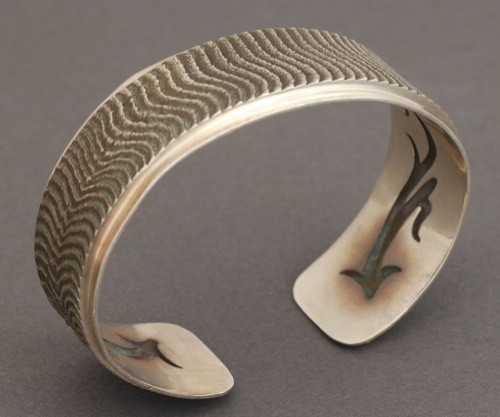
We will be working with the texture aspect - making silicone molds for use with metal clays. Bracelet with cuttlebone texture.

SO, members, bring your tool kits - especially you will need . . .
  • a work surface
  • a roller
  • oil for release if using metal clay
  • clay (optional - we'll be providing silicone molding putty to make texture molds)
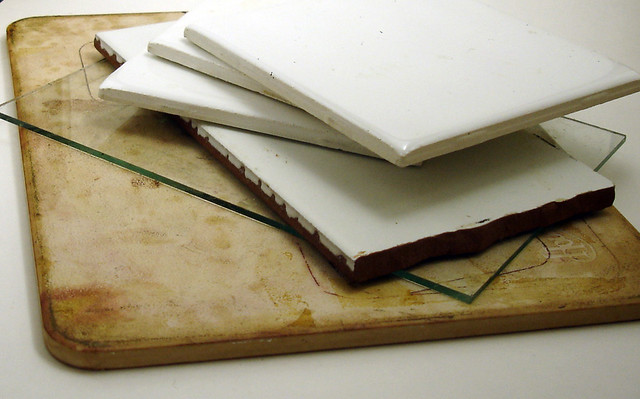
  • small tiles to flatten and/or hold molds
Extra cuttlebones will be available for purchase - we bought a big box!

Not a member? Get onto our email list and receive our monthly meeting Evites by contacting Lynette Fisk. Send me an email with your name and email and I'll make sure you are added. * Remove the spaces in my email address before trying to send.

Note: non-members can come to 2 meetings without joining, but must pay for materials we provide for that night's demo. Membership dues help us provide materials for our hands-on activities.


Wednesday, May 16, 2012

May Meeting Report


We had a small crowd last night – sorry if my late information caused anyone trouble….
Here’s what you missed….

Gale demonstrated putting a metal clay bezel around a piece of pottery or china. NOTE: transfer-ware works best. Some glazed pottery loses color upon high-temp firing, so test fire the pottery first or you may end up with a color-less piece! This sample - which is still adorable - originally also had a lot of dark pink, which almost completely faded.


Tips from Gale:
  • Cut a “window” in the back to prevent tearing or pull-away
  • Designs that span the top of shard must be anchored (with slip, not just water) to 2 or more locations of the bezel or it will straighten and shrink away from the bezel
  • Wide bezels that wrap over the shard can tear upon firing. She recommends adding clay inside bezel instead. (Think window glazing….) Note the tiny tear in lower left of  photo.....
  • Use thin strips of clay rather than syringe clay for more precise, even look.

Those who came to the Saturday workshop at Lynette’s house saw this first….an easy and cheap way to make a metal clay turntable…..we brought beads and condiment cups last night, so everyone took one home.

Here’s a link to Wanaree Taylor’s blot – she a metal clay artist and the condiment cup spinner was her idea. http://artwarebywanaree.blogspot.com/2012/02/make-your-own-metal-clay-turntable.html . I think I’m going to glue the top of a cup to the center of a 6” square piece of matboard – so it’s less tippy.

Cecelia brought a pasta machine, some pieces of take-out box Styrofoam and leaves. Everyone present played with making a nice, FLAT texture plate. NOTE: the 2-part silicone we used last night was slightly sticky and hard to roll - it made you hands feel oily and wanted to cling to the rollers. 

Cecelia used a cheap product she found at Hobby Lobby and said it was very easy to use!


 This one went through the pasta machine a 2nd time, with a thin leaf. Do not change the thickness setting, or the texture material may embed into the silicone.
We were using pens, pencils and stylus on the foam - 
Then mix the putty, flatten slightly and run through the pasta machine - using the thicker settings. Lay the putty over your design and using a brayer or acrylic roller, roll ONCE and step away until the molding compound sets. Don't try to re-roll or you'll get shadows or imprecise images.

When the putty has set (test with your fingernail - if it doesn't leave an impression, its done.) 

Wednesday, March 21, 2012

Tear Away Success

Thanks, Jennifer, for a great night of burnishing and tearing paper and polymer clay! Here is Janice exercising her arm, rubbing and rubbing....
With a row of pasta machines (to condition the Studio Clay by Sculpey), several toaster ovens to cure the clay and a laser printer loaded with glossy paper, Jennifer Finley led us in a productive evening of creating low-relief polymer and paper texture plates.

Experimentation confirmed what the online tutorials told us - not all polymer clays will adhere to the toner on the paper - which is what pulls the design off and leaves the negative plate. Also, when using a commercial copier (such as Office Depot, Office Max, Staples, etc) be sure to specify LASER printer, not ink jet (which results in transfers, not tear-aways).

  • burnish 2 minutes, rest, reburnish 2 minutes
  • work on small ceramic tile that will fit into the oven - moving clay from worksurface to tile causes ripples
  • don't push too hard, but work to create friction heat
  • pull paper away quickly - like a bandage
  • back both clay and paper tear away to get a positive AND a negative plate of same design
  • let clay cool before removing from baking tile
  • use copies that have definition - no half-tones or too-fine lines
Can't wait to see these textures used on some pmc pieces!! 

Friday, March 16, 2012

March 2012 KC PMC Guild Meeting Plan


At our March meeting, Tuesday, March 20, Jen Finley will be teaching us the Tear Away Texture Technique – developed by Gwen Gibson and made famous by Celie Fago’s extensive use in her awesome jewelry.

If you want to read ahead there are several tutorials online. (Search for Tear Away Technique)

The process requires some materials and your texture design must be printed onto GLOSSY paper with an old-style toner copier.
Jennifer will be bringing a variety of designs you may use, but if you want to use your own original texture drawing (such as one of your Zentangle drawings or anything else you have drawn – which we encourage—as long as they are large enough lines. See below.)

Line art printed on heavy glossy paper. Jen will bring a variety of designs that people can use.  If anybody wants to bring their own stuff, there are a couple of options:

1. If you have access to an old fashioned toner based copy machine, the art can be copied onto 32# glossy paper. A canon or HP laser printer will probably work, too.  Inkjet printers will not work and other brands of laser printers are not  likely to work.

2. If you want to copy your own take your designs to Office Max or Staples (80 gloss text) and request copying onto 32# glossy paper.

NOTE: Your designs should be graphic – lines that are too delicate will not transfer well.

The guild will provide:
            Polymer clay (requires old formula Sculpey III or new Sculpey Studio clay) in a light color
            A toaster oven to bake the clay. 
            A dedicated pasta machine (we’ll have at least 3, but the more the merrier. Perhaps the polymer people could also bring theirs?)
Glass mats or flat shiny porcelain tiles to work on
32# glossy paper


 You should bring:
            Work surface
            Polymer working tools (such as tissue blade, acrylic roller etc) optional
            Small glossy tile to bake on
           

Saturday, September 24, 2011

Our Zentangle Meeting

Thanks to Kansas City PMC Guild member Susan Silvy for the Zentangle lesson at our September meeting. Susan is a certified Zentangle teacher and she proved that it is possible to bring a group of talkative, creative artist-types to a completely quiet, focused state in just a few minutes!

Some of us had already tried Zentangling on our own and both Janice and guest Kim brought samples of their work. For others, this was a completely new activity and we all jumped in. (Thanks also to Betty who - though absent - loaned us her vid-cam so we could project Susan's instruction onto the big-screen to help everyone see, and to Janice who brought the tripod.)

In a matter of minutes the room of about 15 went from a loud buzz to completely pin-drop quiet as we all focused into a right-brain creative calm.

It's amazing what simple, repetitive pen strokes can become. Here's a mosaic of all the pieces finished by the end of the evening.
Susan teaches  a more complete Zentangle class. Check her page on Facebook - Kansas City Certified Zentangle Teacher, Susan Silvy for more information.

We want to see any resulting texture plates, jewelry or other items that members come up with using the Zentangle technique as a starting point. Check out our website for meeting information.